by Renee St. Peter.
EXPLORING FRAMING OPTIONS. There is a lot of conversation happening regarding framing watercolors without the use of glass. This trend won’t be going away and NWWS offered this option to the accepted artists of the 2019 Waterworks Unplugged for the first time in our history.
If you peruse the Internet, it appears there are strong feelings about this trend. Some are purists, tied to traditional glass protection and consider anything else amateurish and inconsiderate of conservation. Others, including many professional artists whose names you already know, are exhibiting beautifully framed paintings that do not use glass. Most galleries, who are in the business of selling art, prefer works that are not under glass because they sell better. Why? Because glass adds a layer between the viewer and the painting and can interrupt the emotion. Glass “smoothes out” what is underneath, making the texture of the original more difficult to see. With glass, often the subtle texture that lends authenticity and originality can be lost.
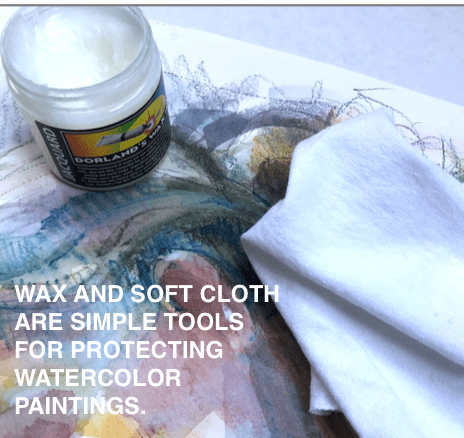
There are many options you can explore without declassing your work and without putting your favorite framer out of work. Work with your frame shop’s expertise so you can maintain protection and also professionally present your work. You must protect the painting properly if you’d like to explore no-glass framing, no matter what protective material or framing style you choose.Some artists are using a wax protection to give their paintings a soft glow that is easy to apply. The wax, such as Dorland’s (yes, Daniel Smith carries it) is non- yellowing. After a couple of light coats of spray acrylic varnish have dried, you can apply 2, maybe 3 thin coats of wax with a small white lint free cloth, drying between coats. Buff the final finish. Frame your piece as you would an oil painting and you’ll have a lovely piece ready to exhibit.

Using a water-based product is trickier because you do not want to disturb the painting you’ve just spent many hours creating. Again, use the knowledge of your framer or an informed staff member at your art store to find the correct spray product that will
protect but not change your painting’s color before applying varnish. With the right barrier, you can then apply a varnish by brush with the sheen of your choice.
Another option is to use gel medium and create a painting texture over the fixed painting. You’ll want to apply an archival varnish atop the gel medium afterward, just as you would protect an acrylic painting.
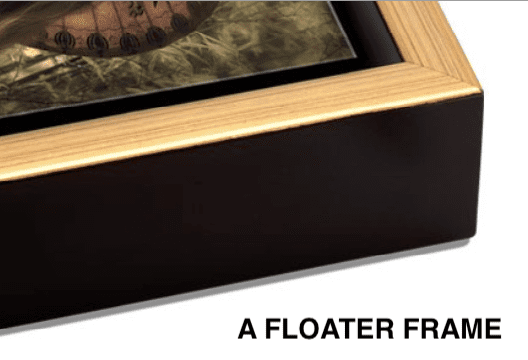
Some artists, especially with smaller pieces, are adhering paintings (with soft gel) to cradled panels, possibly painting the sides a complementary color. The depth of the sides is very gallery friendly. Again, the face must be varnished and protected. This direction allows you to use a floater frame, too, which is always rich.
 So, explore! Ask questions. Research. Experiment. There are many, many beautiful ways to frame without glass, some with a more traditional end result, but you may create your own method that is unique to your work. Take your framer to coffee and put your two creative minds to work.
Professional framers and knowledgeable staff at artists supply stores will give you the best product recommendations to help you achieve framing success. The Internet can be a good source for research, too. Watch many videos to learn from several others so you’ll have more confidence as you try framing without glass for the first time.
You’ve taken a long time to create your painting. Matting and framing can make a difference in how a viewer—or a judge—absorbs your work. Honor your work and your effort with proper framing.
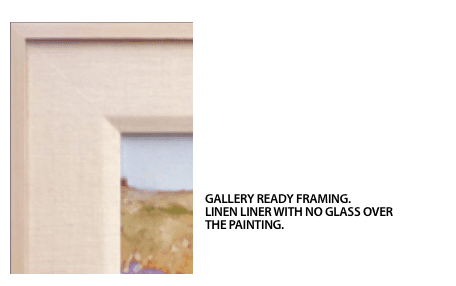
 FRAMING TIP #1: If you frame your own work, remember that you do not want the width of the frame’s face to be the same as the width of the mat or linen liner. If the frame is a substantial 2” wide, you would avoid a 2” or close to it mat or liner width. If you’re trying one of the oil-painting approaches suggested above and the frame is 1” wide, a wider 1.5” is a better choice because the size relationships are complementary.
FRAMING TIP #2: If you’re trying to decide what mat color to put around your painting, remember that the best color choice is usually the one that “goes away”. Lay out several light neutrals and you’ll “feel” the color that does two things: settles in with the colors of your painting and “goes away”. The “goes-away” color allows your artwork to shine because it knows the artwork is the most important. Colored mats always (out on a limb, but feeling good about it) become part of the artwork and are distracting. I’m talking to you, harvest gold, baby blue, and burgundy. Use colored liners sparingly and carefully for the same reason. Make sure there is a reason to do it.
FRAMING TIP #3: Wider mats make your work more professional looking. NWWS requires a 2” mat; however, 2” rarely showcases a painting properly, so start with a visible 2” but know wider is better. Weight the mat by making the bottom width wider than the top and sides. Look at framing in top galleries to see examples of wider mats.

Resources where you can learn more and find a system that works for you: www.rene-art.com
Within Rene Eisenbart’s blog, find her blog post “Acrylic Finishes For Watercolor”.
www.frametek.com
Under “Articles”, find “Float Framing A Watercolor”.
www.jonpeters.com
For more ambitious woodworkers, learn to build a floating frame for a work on paper. In the “search” function, enter: “How to Mount and Frame Works on Paper, NOT Behind Glass”.
www.artistsnetwork.com
At ArtistsNetwork, find “Artists Network TV”, then search for Birgit OConnor. Within the list of her videos is her available video called “Watercolor with Birgit OConnor: Framing Without Glass Video Download”.
YouTube.com
Learn about using wax to protect a panel painting. Search for artist Angela Fehr’s, video titled “How to Mount Watercolor on a Wood Panel: Cheap Alternative Framing Method for Watercolor Paintings.”


